|
|
|
Tips and free sewing patterns
for making machine Cross-Stitch Christmas Stockings:
Our first
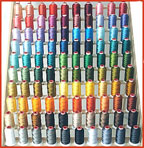
first Cross-Stitch Christmas Stockings set was so popular that we decided to make MORE cross-stitch stocking designs and give a several stocking sewing patterns in various shapes for FREE download. The second stockings set features cute forest animals, elves & Santa in winter season! Here's a photo of all of our stocking sewing patterns that you may download here for free:
Each of the sewing patterns is available in three sizes - large, medium & small - to fit designs in all three count sizes (14, 16 and 18 count), so you just print the size you need. Here are some general tips where to start when making machine embroidered stockings: Download the stockings sewing patterns to your PC and unzip them, don't forget to check the "use folder names" box in your WinZip. After that, if you don't remember the count size of cross stitch designs you've purchased from us, take a look at your designs files' names. It will include the count size. Choose the sewing pattern you want to use, it's size should be corresponding to your designs count size.
Preparing the pattern:
Print out the pattern (if it's too large for one sheet of paper and is divided to 2 or 3 parts, print all of them and glue together according to arrow marks). Take a piece of tracing-paper, put it over the originally printed "stocking body" pattern and mark a very similar pattern on the tracing-paper. Cut the tracing pattern out using scissors. Cut out all the other pattern parts as well.
Preparing the fabrics:
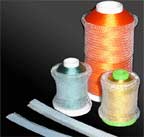
Prepare the fabrics you're going to use, paying special attention to the piece of fabric that is supposed to be your stocking's "body" front. It should be a few inches larger from each side than the "body" sewing pattern, because each embroidery design should be located on a little different place on stocking due to their different shape and you will need space to move the fabric to position it correctly on sewing pattern after your design is stitched. You don't need fancy fabrics, a very simple one-color woven will do it's job very well. It shouldn't be too heavy. You may also use some batting (preferably polyester) to make your stocking "fat".
Embroidering on stocking front:
Stabilize the fabrics piece that is supposed to be stocking's "body" front part. Hoop it carefully and stitch the design, using color stops list. Unhoop the ready embroidery and iron it carefully between two towels.
Cutting the fabric:
Place your finished embroidered design on a flat surface and position the "body" pattern on it, make sure that the design is exactly at the right place (you should be able to see it through the tracing paper. Mark the fabric according to pattern contours using temporary textile pencil. Cut the fabrics 1/3 inch over your marks. Repeat the same procedure with all the other stocking parts. For similar parts just double-fold your fabric, pin it and cut only once, it's faster and more accurate.
Sew your stocking!
CLICK HERE to return to christmas stockings sewing patterns index...
|
|
|
|